
Adding Custom CSS
Adding Custom CSS
There are different ways to customise your StoreConnect store’s CSS. The best option to choose will depend on your current needs. You can add CSS using the following methods:
- Add CSS to the custom style field
- Using Style blocks
- Upload a CSS stylesheet file to theme assets
- Adding CSS through Content Block
Add CSS to the Custom Style Field
Custom styles are any small stylesheet tweaks you want to put on your store. Also, we recommend this option when you are developing a new theme or adding your own CSS rules and want to see or check a quick update on your site.
Anything you put here will be inserted immediately before the closing </head> tag on your store after any Head Content Block. The content will be inserted within <style></style> tags. Make sure to enter valid CSS. See Custom Theme CSS for more information.
The easiest way to add your custom CSS is to follow the instructions below.
Follow these steps:
-
Go to your store’s Store record
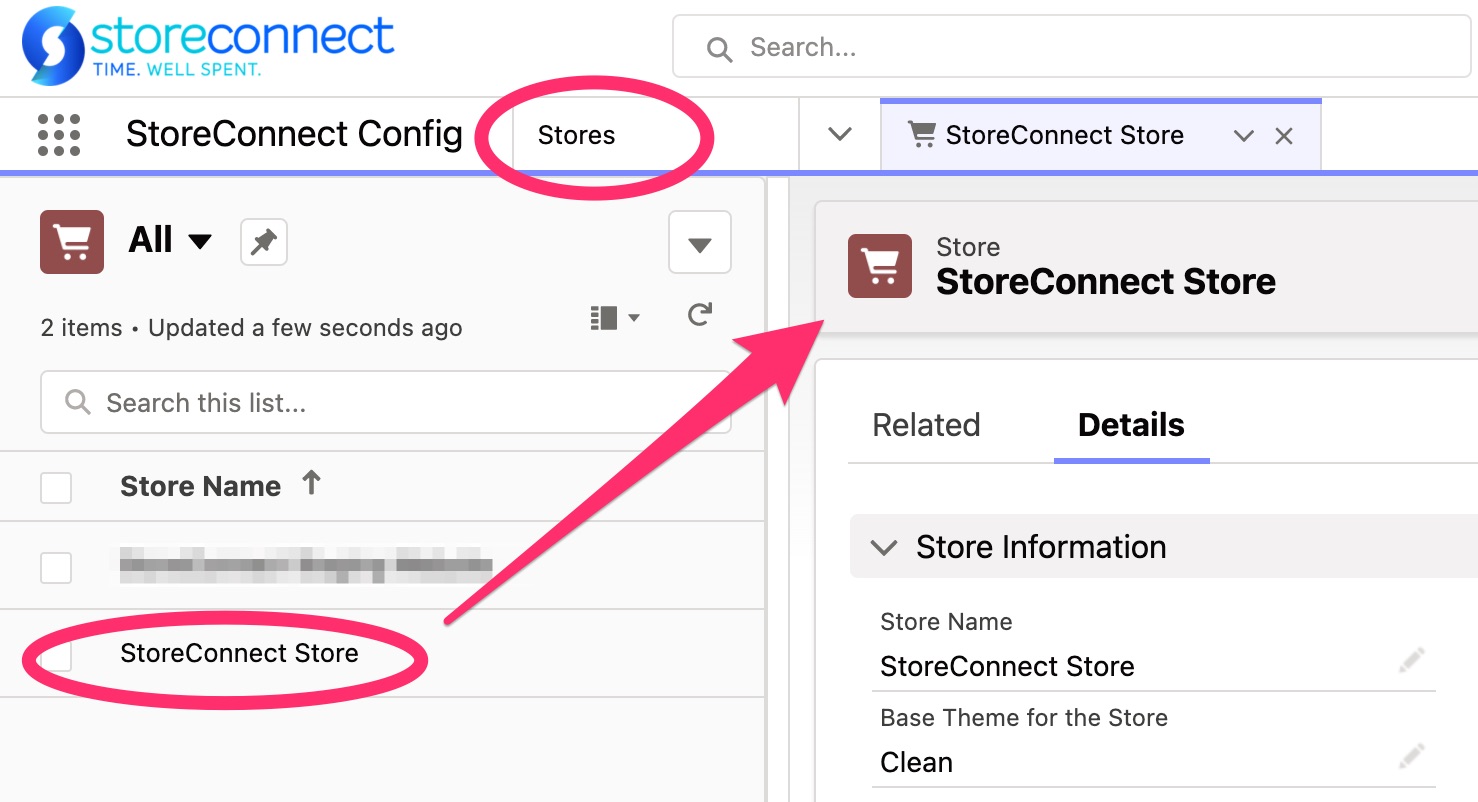
{: .img-border } (above image) The Store Record
-
Find the Custom Styles field under the Content Management (CMS) section
-
Click on the right hand pencil or press the Edit button
-
Insert your custom styles into the field
-
Click on Save and your changes will appear shortly after
Note that this option can lead to an extensive store settings page due to your CSS rules, which will hinder the user experience on the store settings page layout if it grows considerably. Also, your CSS will be less organised and harder to maintain when having a large number of CSS rules.
Use Style blocks to Upload your CSS
Uploading your CSS via styles blocks will allow you to have organised and more maintainable CSS. This in an optimum solution when making significant changes to your site as it allows you group or separate your CSS rules and review each of them quickly.
Instructions
-
Click on the app launcher

-
Search for Style Blocks and open that tab
-
On the right hand, click on new
-
Give it a useful name and assign it to your store
- Define the configuration for your Style Block
- Media: Specifies what media or device the style is optimised for (this is for your own reference only)
- Active: Activate or deactivate this style block
- Global: Does this CSS apply to the entire site and so should load automatically when rendering each page?
- Position: If you have multiple style blocks, you can set the order they load
- Define the style content: You must use one of these options:
- Stylesheet URL: Use an external link to bring in your CSS
- Content: Define your CSS rules inside this block
This content will also be inserted within <style></style> tags and immediately before the closing </head> tag on your store. You can create as many content style blocks as you need.
How to Add CSS Theme Assets
You can upload a CSS stylesheet file to the theme assets. It’s an excellent option if you have a curated file and want to use a link referral instead of printing your entire CSS within a<style> tag. Note that this option is available as long as you have an active theme in your store.
If you are developing a new theme, we recommend using this option once you are done with the development phase, as you can’t edit the CSS directly in the theme object interface. You will need to upload a new file every time you make a change so during development use one of the other options then migrate to a file in your theme.
Instructions:
- Go to the Theme tab
- Open the theme you are working on
- Click on the related tab
- Within theme assets and click on new
- Use this key
theme-supplement.css - Upload your CSS file
- Click on Save
How to Add CSS Using Content Blocks
Sometimes you will need to add short CSS rules within a content block or page. You can insert CSS within a content block as long as you use the <style></style> HTML tag.
Instructions:
- Create a content blocks and select the “no added styling” template
- Paste or write your CSS within the content field and within the
<style></style>tag
Now you have two options for using this content block within your store.
The first option is to use the following liquid renderer within your Head Content Block:
{{ all_content_blocks['your-content-block-identifier].render }}This option will work as global CSS if you use it via the Head Content Block.
As a second option, you can relate this content block to a page or relate it to another content block. This won’t be global and will work within the content block or page only.
Third Party CSS Libraries
StoreConnect does not support any third party CSS libraries, such as bootstrap. If you choose to include third party libraries you do so at your own risk and with the knowledge that their inclusion may conflict with existing StoreConnect CSS code. These conflicts may change the design, look and feel of StoreConnect webpages including but not limited to the Cart and Account pages.
Take into consideration that StoreConnect use its own CSS library that could potentially be in conflict with a third party library. However, if you are sure of what you are doing you can reference your CSS library in the head content using a Style Block or directly in your Head Content Block.
Instructions:
-
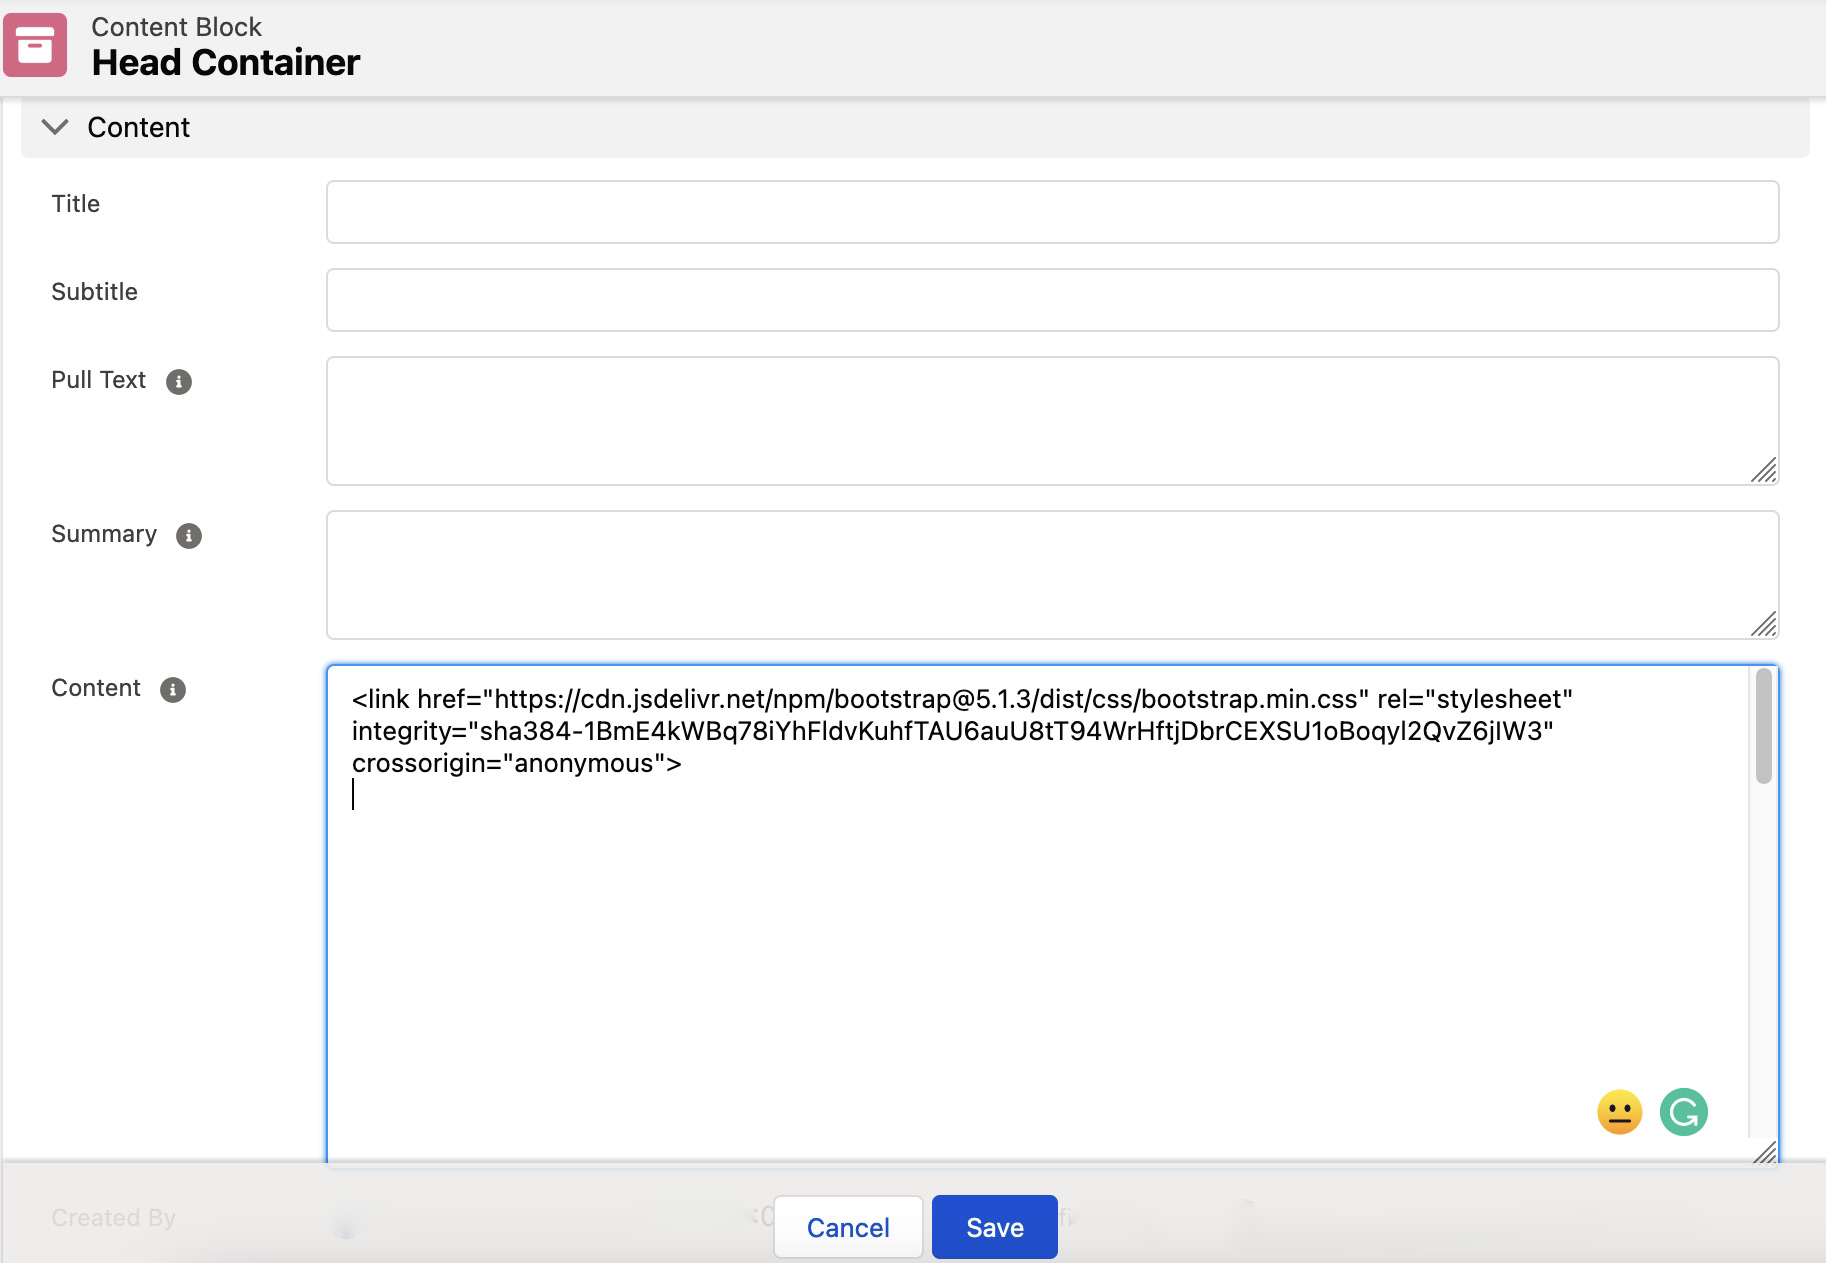
Create a Content Block and select the “no added styling template” (If you already have one go to step #3)
-
Provide a name such as “Head Content” or the name of your choice
-
Paste your link tag provided by your third party library
-
Click on Save
-
Now, go to your Store record and assign this new Content Block as the Head Content
- Under the CMS section click on the Head Content field
- Search for your head content block
- Click Save
-
As a final step, check your site to make sure there’s no design conflicts with your library
Related help documents
- Custom Theme CSS
- Using CSS with Content Blocks
- Adding Custom Javascript, Scripts, CSS & Body Content
Back to Documentation