Adding Custom Javascript CSS and Head Content
Quite often you will need to add some custom CSS[^css], Javascript or add a<head>[^head_tag] content tag such as the Google Tag Manager into your online store. StoreConnect provides 3 different ways to insert data into your site on a per store basis in the Content Management (CMS) section of the Store record.
Head Content Block
-
Create a content block and use the “No added styling” template
-
Provide a name such as “Head Content Block” or a name of your choice
-
Use the content field of this new content block to insert or paste any block of code, script, tag, etc. you need to insert into the head section of your site
-
Click Save
-
Now, go to your store’s Store record and tell it to insert your content into the sites head
- Under the CMS section click on the head content field
- Search for your head content block
- Click Save
We recommend using this head content block when you need to insert global and custom liquid code, font links, and Javascript with liquid code. There are more efficient ways to insert Javascript libraries and snippets in the section below.
Javascript & Script Blocks
Uploading your JS and any script block can be done using the Script Block object. This will allow you to have scripts well organised and maintainable. Any script block will be inserted into the <head>...</head> tag of your store.
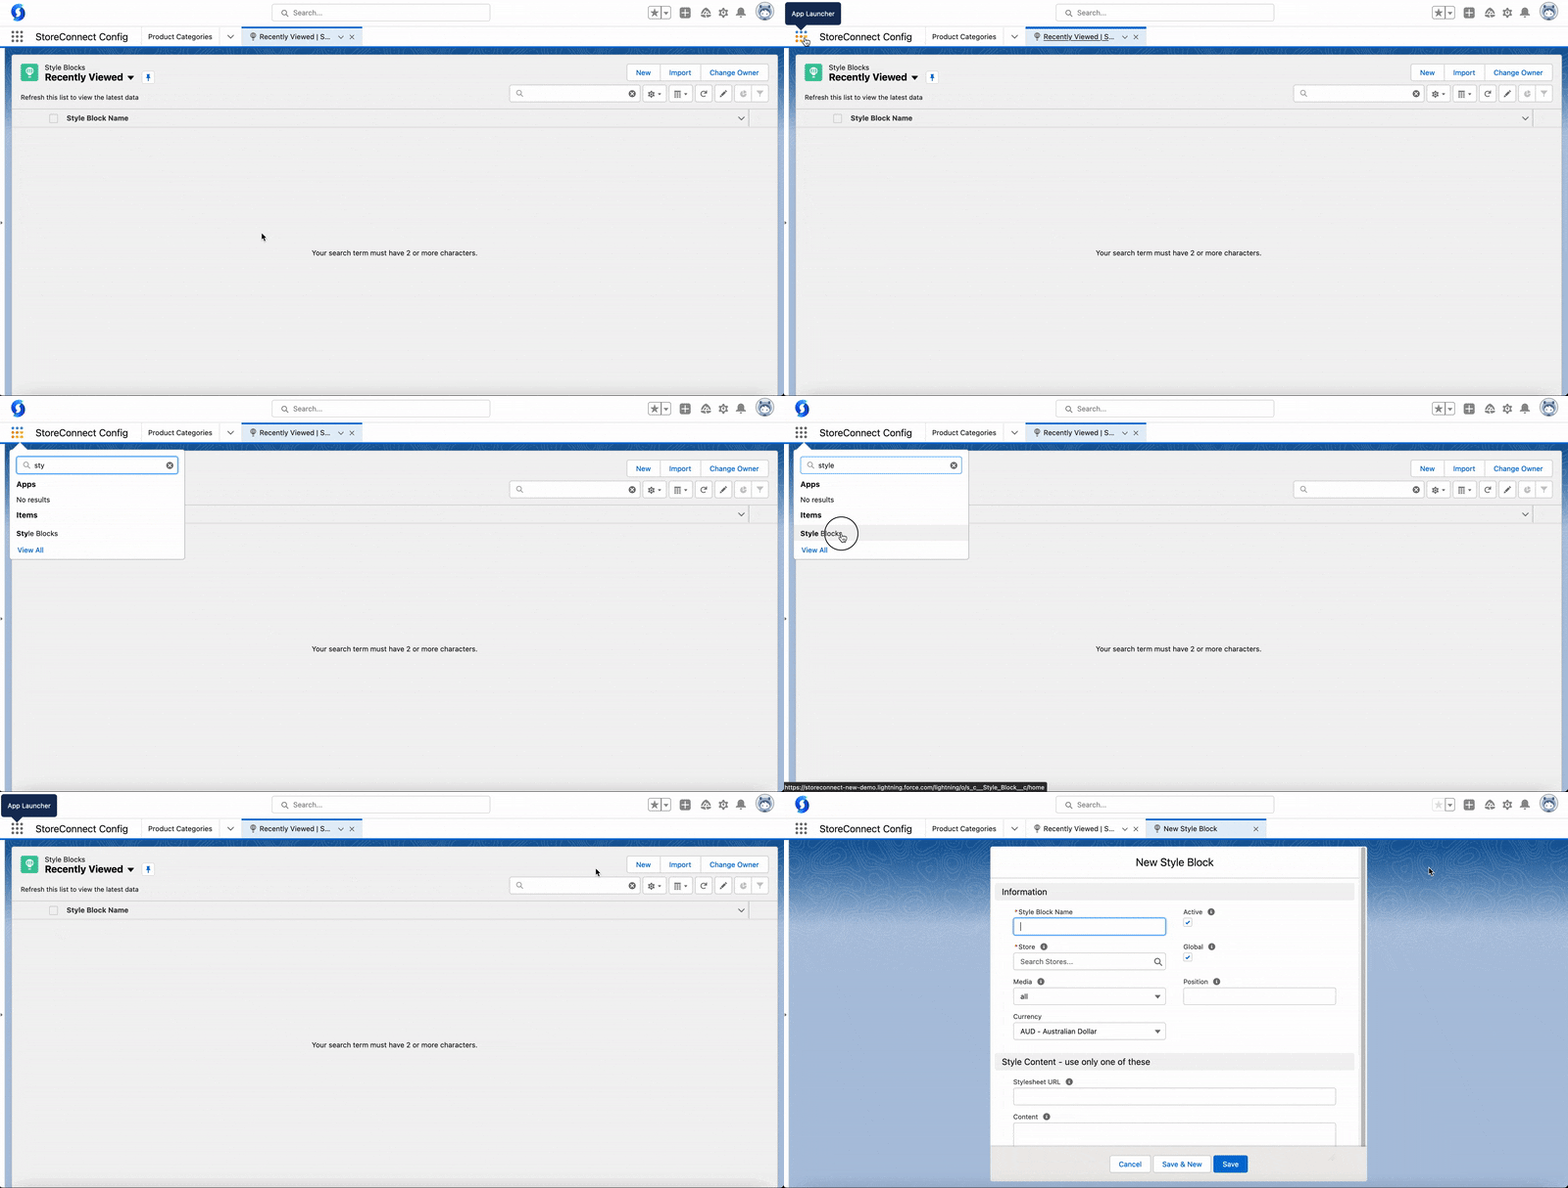
Instructions
-
Click on the app launcher

-
Search for Script Blocks and open that tab
-
On the right hand, click on New
-
Give it a useful name and assign it to your store
- Define the configuration for your Script Block
- Store: Select the store you want to assign it to
- Active: Activate or deactivate this script block
- Global: Does this script apply to the entire site and so should load automatically when rendering each page?
- Position: If you have multiple style blocks, you can set the order they load
- Define the style content: You must use one of these options:
- Script URL: Use an external link to bring in your Javascript
- Content: Define your Javascript here
You can also add things like Facebook pixel code, or domain name validation meta tags, etc. as long as they are not wrapped with <script> tag as all content in Script Blocks will automatically be wrapped with this HTML tag.
Important: You won’t be able to use liquid code within Script Blocks. Instead use the Head Content Block per the instructions above.
Related help documents
CSS and Custom Styles
This section is now available at:
Body Content Block
The Body Content field is a link to a CMS Content Block that contains anything you wish to insert at the end of the <body>...</body> of your store.
Common uses for the Body Content block are Live Chat scripts, or other custom javascript that needs to be loaded after the store page has been loaded.
Instructions:
-
Create a content block and use the “No added styling” template
-
Provide a name such as “Body Content” or a name of your choice
-
Use the content field of this new content block to insert or paste any block of code, script, tag, etc. you need to insert into the body section of your site
-
Click Save
-
Now, go to your store’s Store record and tell it to insert your content into the sites body
- Under the CMS section click on the body content field
- Search for your body content block
- Click Save
Related help documents
Debugging Solutions
Implementing custom scripts can have drawbacks, especially when injecting custom JS. One of the most common issues is when your JS doesn’t trigger despite having correct syntax and no errors.
The most straightforward solution is to always wrap your code within a DOMContentLoaded or onload event listener. Here’s an example of how to do it using DOMContentLoaded:
<script type="text/javascript">

  // Example 1
  document.addEventListener('DOMContentLoaded', () => {
    console.log('Hello!');
  });

  // Example 2

  document.addEventListener('DOMContentLoaded', init);

  const init = () => {
    // logic here
  }
</script>
Feel free to structure your code in a way that meets your specific needs, while also taking into consideration the approaches mentioned above.
Back to Documentation