
Using CSS with Content Blocks
Related help documents
For users wanting more flexibility and customisations for their store, there are CSS selectors that allow users to select content blocks, child content blocks, and other elements for full styling with your own custom CSS.
The StoreConnect system allows custom CSS and JavaScript throughout your store. For CSS implementations, we strongly recommend methods highlighted in this article: Adding Custom CSS.
To select content blocks for styling, each has its own unique identifier that can be used to select the elements and apply styles to them.
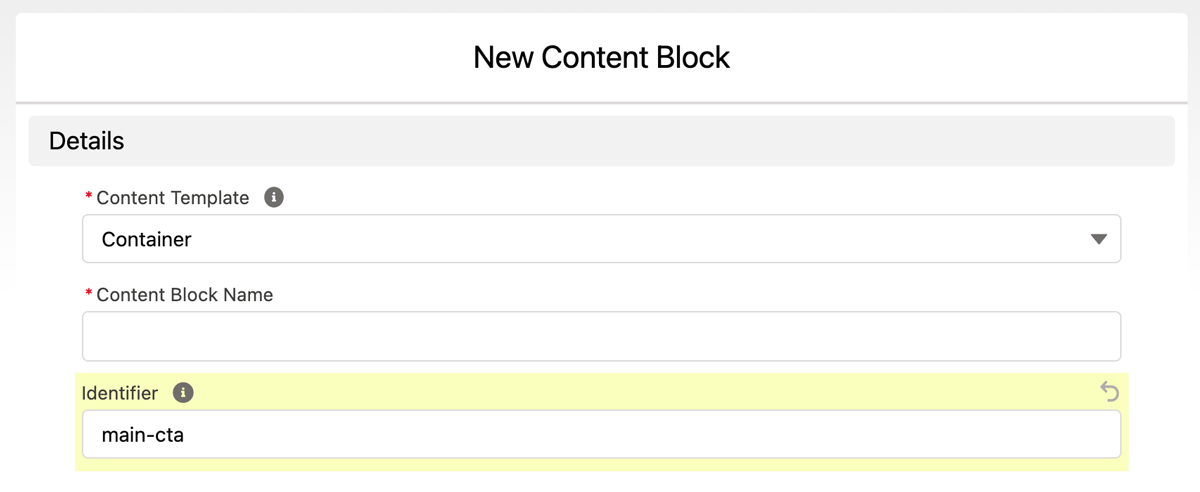
The identifier is user generated and specified underneath the Content Block Name, as you can see here:
Using the Content Block ID as a CSS Selector
In your custom CSS Field, you can simply insert your unique identifier into the following code
SC-ContentBlockContainer-{identifier} to select and style your Content Block.
For example:
#SC-ContentBlockContainer-main-cta {
   max-width: 1200px;
   margin: 0 auto;
}
If you need to apply the same style to multiple Content Blocks - you can aggregate selectors for the styles to be applied.
This could be achieved as follows:
#SC-ContentBlockContainer-main-cta, #SC-ContentBlockContainer-main-info,
#SC-ContentBlockContainer-secondary-cta, #SC-ContentBlockContainer-main-new {
   max-width: 1200px;
   margin: 0 auto;
}
Using your Page as a CSS Selector
You can also target a whole page which helps it terms of css specificity or targeting one specific element or block within a single page, some examples:
- Home page:
#SC-pages-home - Page template:
#SC-pages-show - Articles Index:
#SC-articles-index - Category template:
#SC-categories-show - Product page template:
#SC-products-show
If you want to be more specific in regards to what page you want to target, then you will need to follow the same principle as you did targeting the content blocks. This time, you use the page or article identifier and append it to the following code.
- Pages:
#SC-page-{identifier} - Articles:
#SC-article-{identifier} - Single Category Page:
#SC-category-{identifier}
Important note If you have access to and are using Theme Builder (Beta), using a specific ID is not fully supported. Contact the support team to get more assistance so they can guide you on how to generate your own IDs.
You can also use the inspector tool of your browser to find these selectors and classes.
By default, the StoreConnect App provides specific styling such as spacing, margins, etc. to each of the templates mentioned above. Having access to these IDs will help you to override such styles and thus providing you more flexibility on how you want to style your content blocks for any given page.
Overriding Default CSS Classes from StoreConnect
Let’s say you want to style the heading of a page you just created, so using the inspector tool from your favorite browser, you will find that you can override the following CSS class as follows:
.SC-PageHeader_heading {
  font-size: 40px;
}
Now, you will notice that this will make all your headings 40px on all your pages. If you don’t want this effect, then you can be more specific using the page ID. Example:
#SC-page-example .SC-PageHeader_heading {
  font-size: 40px;
}
Best Practices
StoreConnect always recommends keeping your CSS clean and clear.
If you are using custom classes around your store try using a CSS methodology such as a BEM or SMACSS (just to mention a few) as it will allow you to have a more maintainable CSS and Style throughout your site. Also, be careful if you use a CSS library such as Bootstrap or Foundation as they could have classes that accidentally override the StoreConnect default classes.
Back to Documentation