Migrating From Sandbox
You may have a need to move your StoreConnect records from a sandbox to your production org. An example may be that you have other integration work being done around StoreConnect in a sandbox and you set up products and built your site content in this environment and now need to move it to production to go live. As Salesforce record ID’s will change when inserting records into another org, a simple ‘copy and paste’ won’t allow you to maintain the many relationships that you will have between your records. There are probably apps out there that will handle this very easily but if you don’t have access to anything like that, using a standard data loader app like dataloader.io will allow you to achieve what you need with a little bit of time and concentration. Whatever app you use to export and insert, it is expected that you already have a sound understanding of how to use it and of the basic Salesforce data structure.
Export Your Records
Before exporting any data, make sure the StoreConnect Package version is the same for both orgs. You can check this from Setup -> Installed Packages.
You will want to grab the records from all objects that have data you want to move to Production. This includes any objects that create the links between one object and another, for example the Product Tax object that links products to their respective tax rates. Create a list of all objects you want to migrate using our full list of StoreConnect objects as a guide.
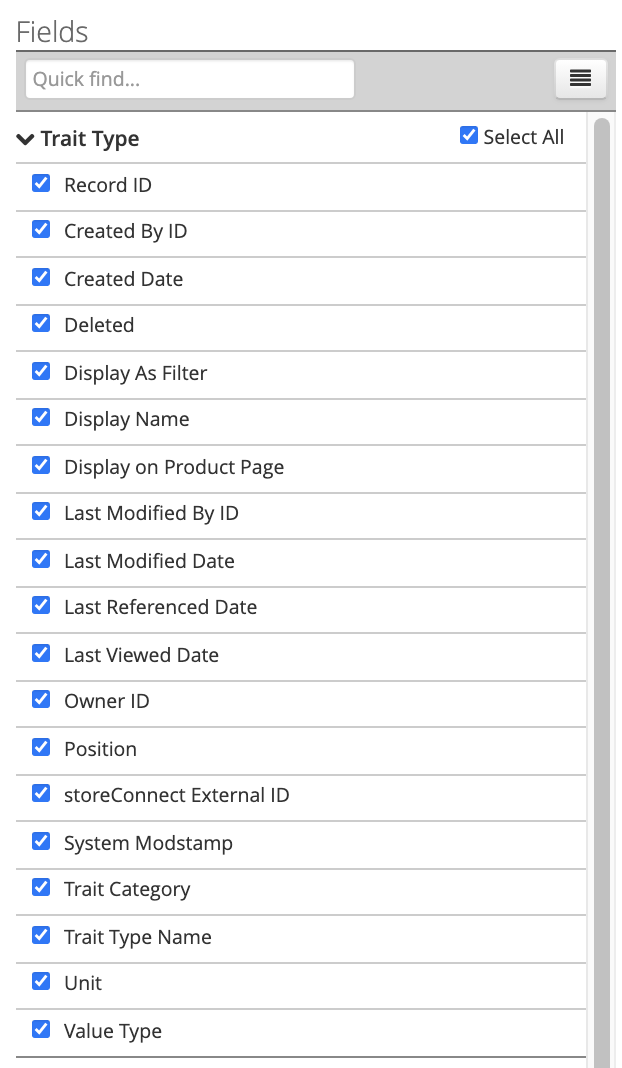
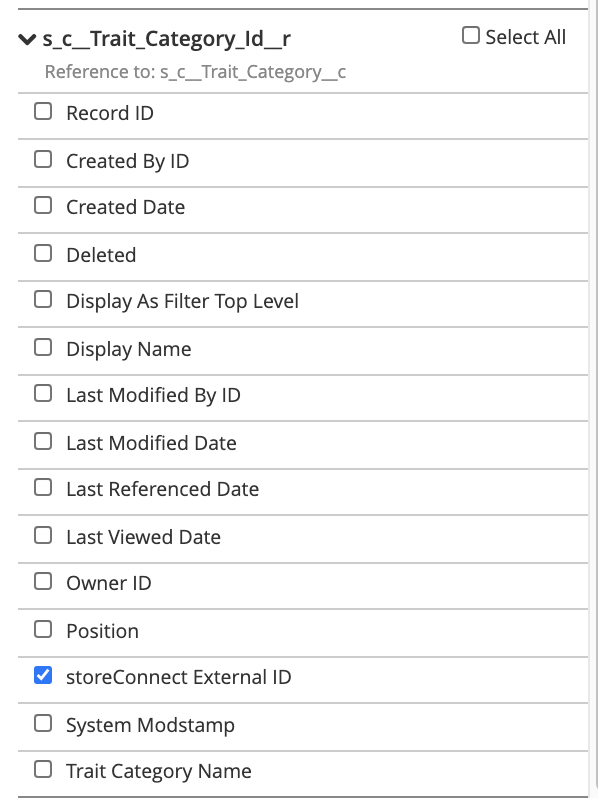
When exporting an object, its recommended that you grab all fields from that object and a unique identifier from any related objects. This unique identifier is what you will need to re-establish the relationships between records. All StoreConnect records have a StoreConnect External ID that is unique and can be used for this purpose. If you need to bring over non-StoreConnect objects, you will need a unique field to reference, so you could use the Salesforce Record ID if there is nothing else but would need to add a text field to the object in the other org to hold that ID temporarily until the migration is completed. You may also want to maintain the record owner for each record. For this, you could use the Username field but would have to edit them in the export file to remove the .{SandboxName} from the end so they match what is in the production org.
In the following example, Trait Types are related to a Trait Category. To relate the correct Trait Types to the Correct Trait Categories when inserting, we can use the External ID of the Trait Categories as we know the External ID is unique for each Trait Category and will exist, unchanged, in the production org after Trait Categories are inserted. We can grab the related record’s External ID on the export process so it will appear in the same export file.


Insert Your Records
Before inserting your records to the production org, you will need to work out a logical order to insert each object. As some records have lookups to others, the records being looked up need to exist and so need to be inserted first. An example where this may not work is for the Stores object. Pages have a lookup to Stores and Stores has lookups to Pages. In this scenario, you should insert the Store records without mapping any lookups to Pages and then after Pages have been inserted, come back and either manually or in bulk, update the Store records with their page lookups. You will need to do the same for objects where records reference another record from the same object, like Pages and Article Category do.
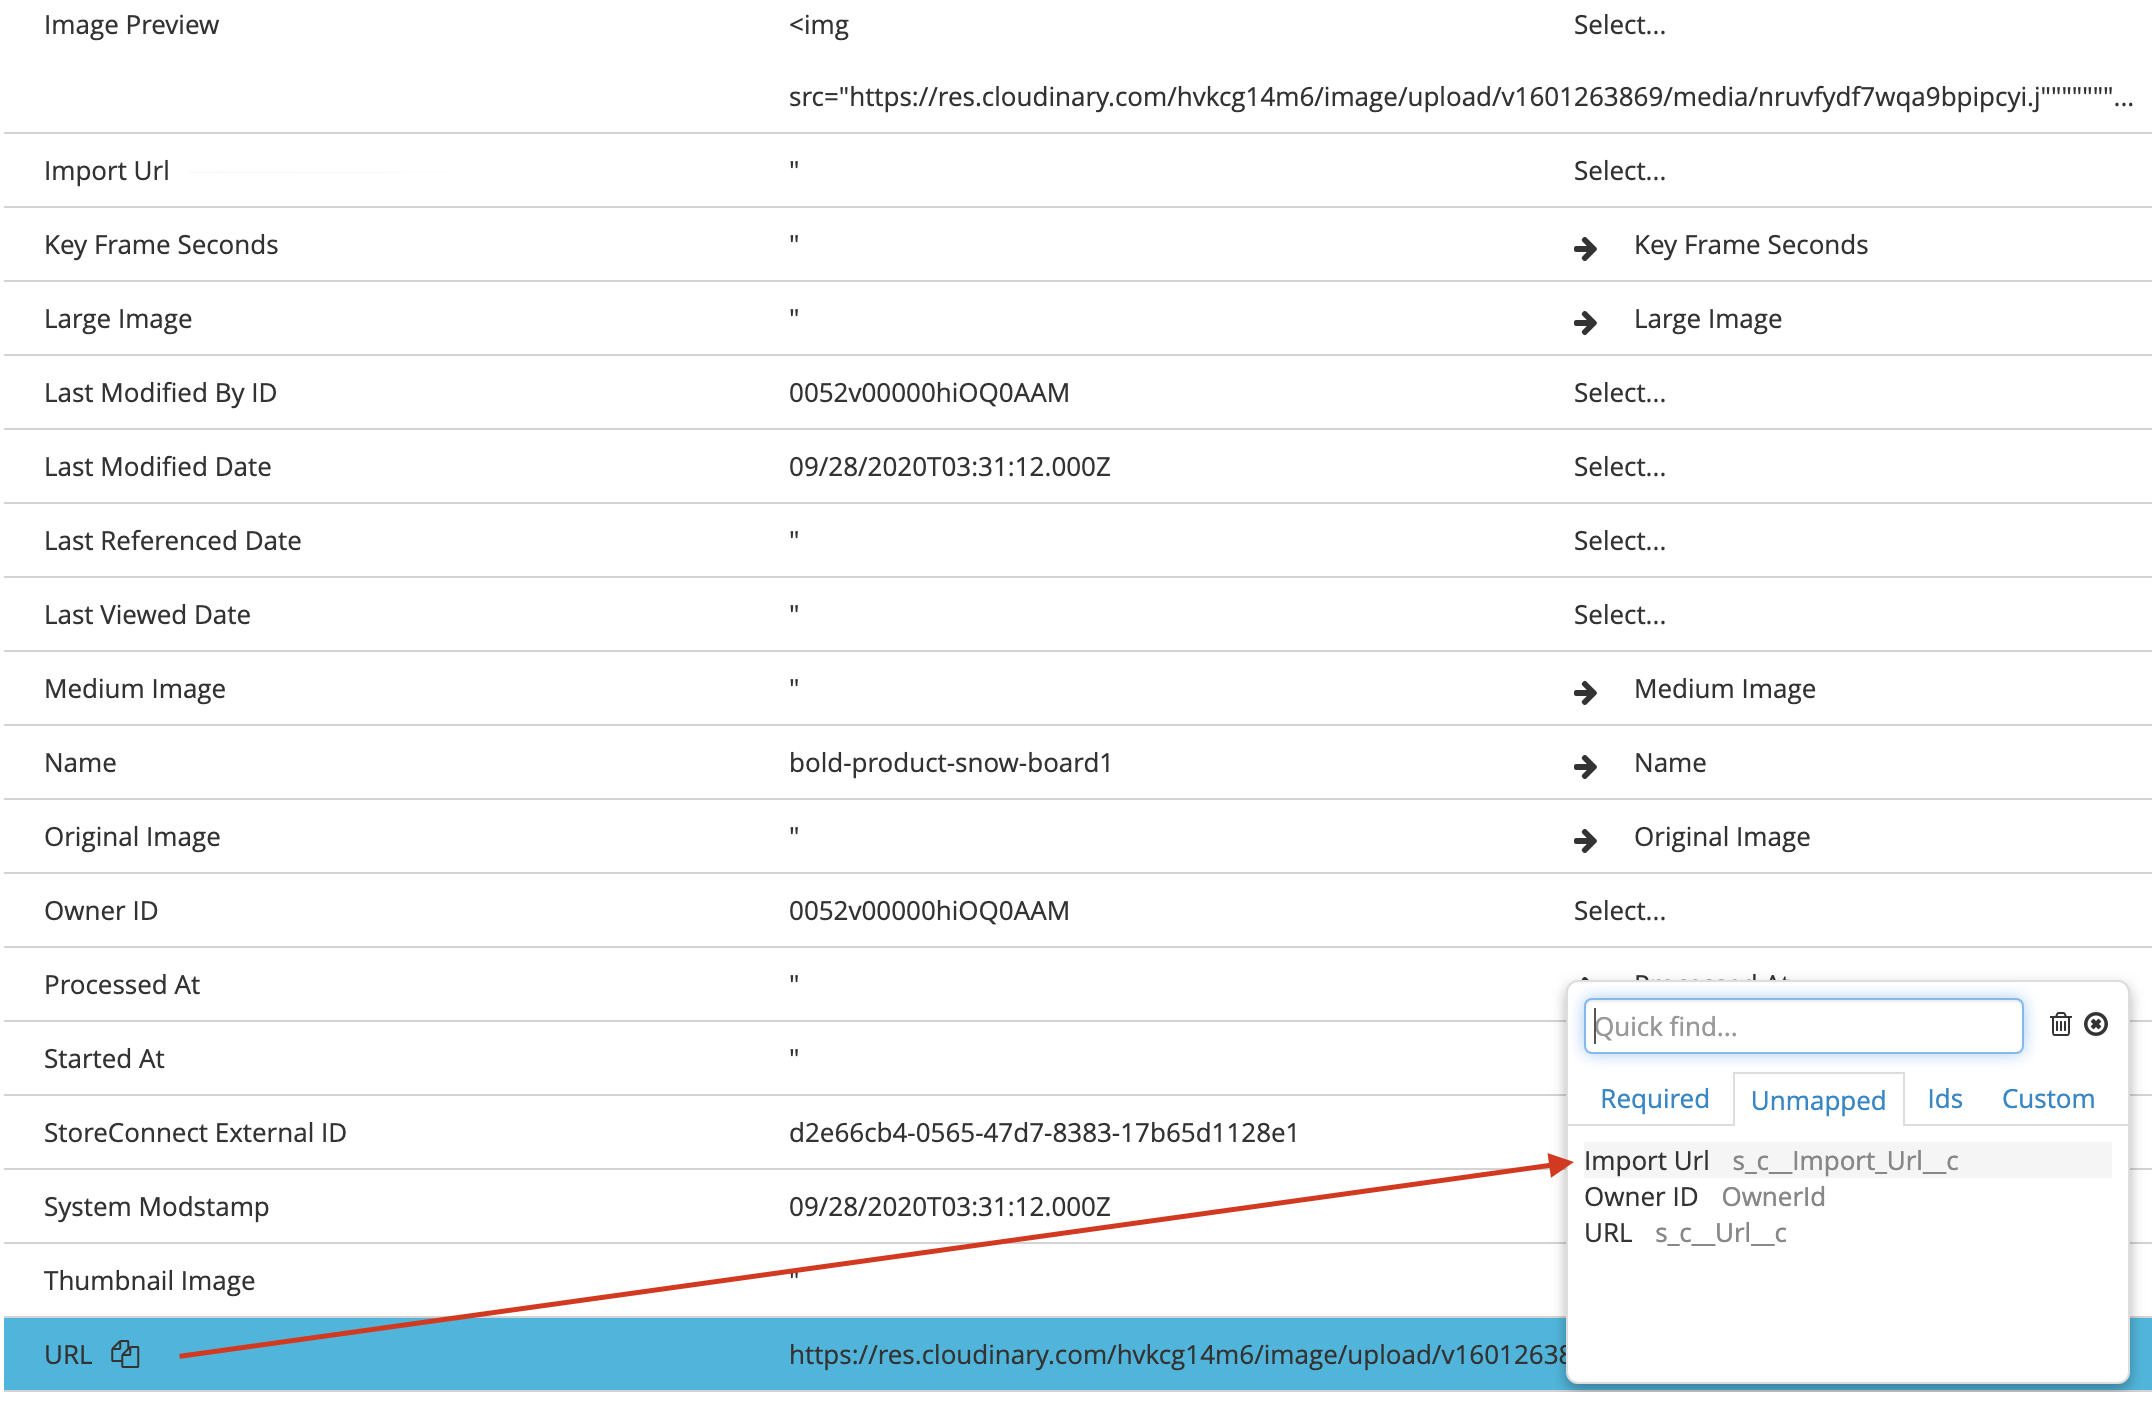
When mapping your exported CSV columns to the production org fields, don’t map any fields that contain Salesforce ID’s to Lookup fields in your production org as those Salesforce ID’s will likely not match any records there. Map the StoreConnect External ID for each object referenced in your export file to its respective lookup field (shown in red on the below diagram), and tell your app to find the correct record via the StoreConnect External ID as this will exist in your production org if you have inserted that referenced object already. There are some lookup fields like Owner ID that are optional and will get populated automatically if you don’t populate them.

The Source Header is the column header in the export CSV, Sample Data is data from the first record in the export CSV and Salesforce Field is the field you want to map each column to in the production org.
Media
If moving from a staging StoreConnect website to a production website, a different CDN1 space exists for each. Your staging CDN space may eventually no longer exist so you will need to insert your media into the production org and then copy over the media from the staging CDN to the production CDN.
This is fortunately easy to do. When you insert your media records, map the URL in your CSV to the Import URL in your production org. Don’t map any value to the URL field. When the Import URL field has a value, but the URL field is blank, it will prompt a job to run that will import all of your media from the sandbox’s CDN into the production CDN and it will insert the new URLS into the URL field for you.

Things to Consider When Migrating
- Any new picklist values added to in sandbox may not exist in Production. If you get errors regarding missing picklist values, you will need to add them manually and then insert the records that failed
- You will get duplicate errors when inserting Products and Pricebook Entries due to the StoreConnect Shipping and Promotion products that get added by the package on install. They do not need to be imported again or updated so you can ignore those errors.
- You can export StoreConnect Settings Metadata but you can only update them manually to the production org via Setup -> Custom Metadata Types
- If updating a Store record, make sure you do not overwrite the domain as this may be different between the staging website and the production website
- Make sure each Store’s Mail From Address is setup as an Organization-Wide Address
Example of Insert Order
This example does not include all possible StoreConnect objects but can be used as a guide when working out in what order to insert.
- Pricebook2
- Media__c
- Country__c
- Zone__c
- Zone_Country__c
- Tax__c
- Content_Block__c
- Content_Blocks_Children__c
- Trait_Category__c
- Trait_Type__c
- Trait_Value__c
- Stock_Location__c
- Store__c
- Transactional_Email__c
- Shipping_Provider__c
- Payment_Provider__c
- Shipping_Rate__c
- Taxonomy__c
- Product_Category__c
- Product_Category_Hierarchy__c
- Content_Blocks_Product_Categories__c
- Page__c
- Content_Blocks_Pages__c
- Article_Category__c
- Article__c
- Articles_Article_Categories__c
- Content_Blocks_Articles__c
- Product2
- PricebookEntry
- Products_Product_Categories__c
- Content_Blocks_Products__c
- Product_Media__c
- Product_Tax__c
- Product_Variant__c
- Related_Product__c
- Trait__c
-
CDN A Content Delivery Network (CDN) is a cloud-based platform outside of the Salesforce ecosystem that StoreConnect uses to store all your media files. ↩
Back to Documentation