How to Create Your StoreConnect User
This guide provides step-by-step instructions on how to create and configure a StoreConnect integration User account within Salesforce by using the Salesforce Integration License.
Creating a StoreConnect Sync User using a “Salesforce Integration” license
Creating a sync user using the Salesforce Integration license will help save on a Salesforce license being used. To do this, follow these steps:
- Create a new user, call it something like “StoreConnect Integration User” and assign it the following:
- User License: Salesforce Integration
- Profile: Salesforce API Only System Integrations

- Permission Set License Assignments:
- Salesforce API Integration
- Salesforce API Integration

- Permission Set Assignments:
- StoreConnect Sync Standard Permission
- StoreConnect Sync User Permission

Creating a Sync User Video
This video will guide you on the steps to create a sync user per the instructions above.
Set the Verification Method
Once your sync user is created, make sure to set a password from the Salesforce email you received, after you have set the password a screen saying the changes were saved successfully will show, you will then need to log into Salesforce again with the new password to configure the verification step.
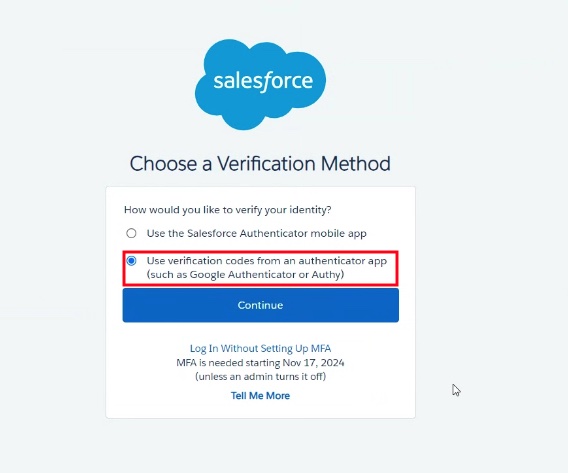
After you have set a password, go to login.salesforce.com and log in once more. If the sync user is required to have MFA, you will be asked to choose a verification method. Select “Use Verification codes from an authenticator app” (Such as Google Authenticator, Authy or Duo).

Currently the Salesforce Authenticator mobile app is not supported by StoreConnect’s Setup Wizard
This verification method is required to ensure the Sync User authenticates when setting up StoreConnect, you will need to log out and then back into your own Salesforce User account again afterwards to re-gain access to the Org. This may require clearing the locally managed site cookies from your browser.
Back to Documentation