Adding SVG Media
Adding SVG media to your pages works best by inserting it with liquid tags.
This allows users to embed the image within a content block without creating a separate single image content block (which will also render SVG images.) The main benefit using liquid is that you can apply css styling to liquid code in markdown and customise your image size and styles.
If you decide to use the single image content block, you still target the block with css, the draw-back is that your image will be rendered as a single image without injecting the SVG code in the HTML source code. This is can cause animated SVGs not to animate or can limit the CSS you use wiht your SVG media.
Important note: The following instructions require some knowledge of HTML and CSS.
Instructions:
First, go to media > new and add your media.
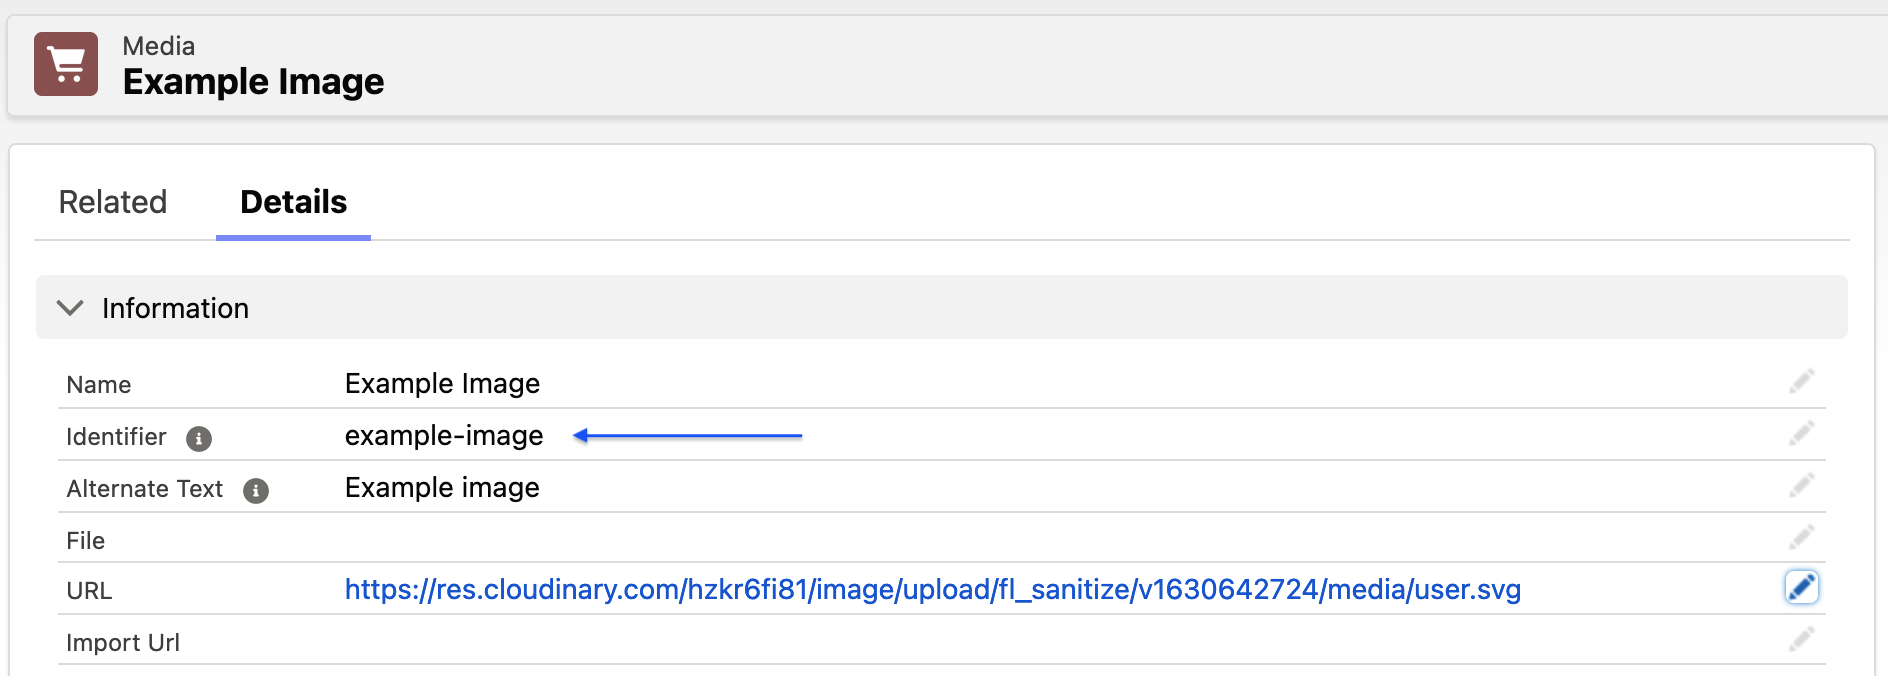
Now, click on the edit field icon and add fl_sanitize just before /v1628486251

Your SVG url will look like this:

This is important. SVG files are essentially text files with instructions to the browser to create graphic elements. Adding the fl_sanitise option allows you to address the SVG code and insert styles to the SVG code via CSS. Without this option, the Content Delivery Network will present the SVG file as a rendered image whose parts cannot be directly specified with CSS.
Second, create a content block and select a content template that supports liquid tags. You can either choose the “No added styling” or the “text” content template.
Third, in the content field, use code similar to the below to insert your media:
<object data="{{ all_media['you-img-id-here'].url }}" class="your-custom-class" alt="My favorite image"></object>
Your will need to replace your-img-id with actual SVG media ID found on its record page.

Notes
As you can see, the SVG media is wrapped within the <object> HTML tag, which helps render the SVG media correctly. Other HTML tags may create errors or your media either not rendering correctly or not rendering at all.
This is true when you are adding SVG images with liquid.
Additional References:
You can check the following article if you would like to learn more about how to insert media using liquid tags:
Back to Documentation